Oh boy!!! It’s been a while since my last post! Anyways, moving on to this looooong overdue tutorial! This time, I’ll show you how to edit certain objects of an existing image by changing the text, shapes and colours without using any photo editor.
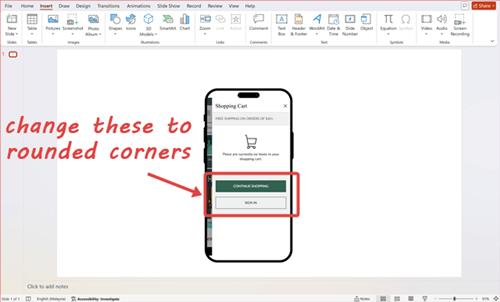
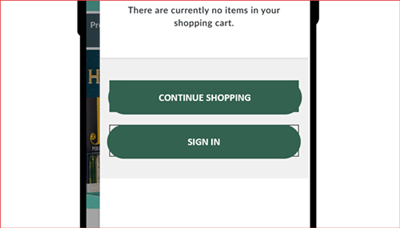
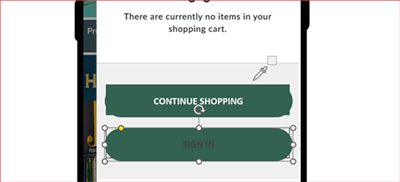
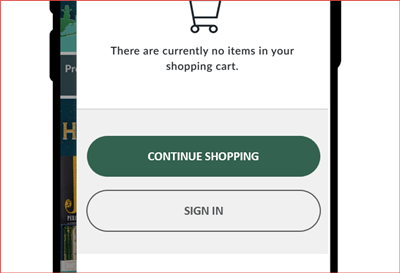
Let’s take this image (taken from Barnes & Noble) as an example. I want to change the current rectangular shape of the two buttons into rounded corners:
Create the first rounded button
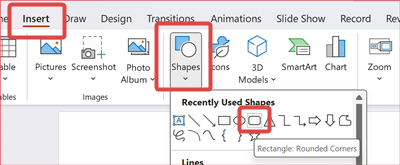
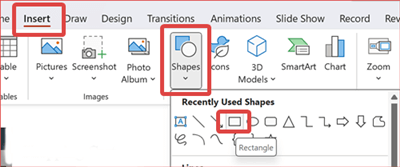
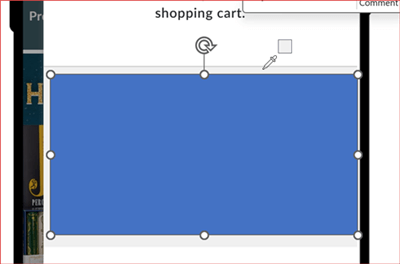
1. On the Insert tab, in the Illustration group, click Shapes and select Rectangle: Rounded Corners.
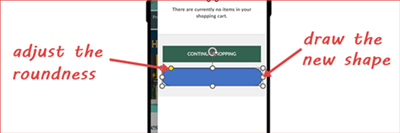
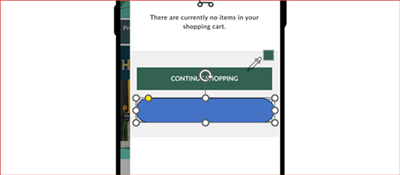
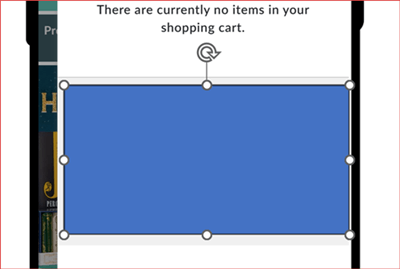
2. Drag to draw the shape just below the “CONTINUE SHOPPING” button. This will help you gauge better on the size of the rectangle so that it is close to the original. Click the anchor point (i.e., the yellow dot) to adjust the roundness.
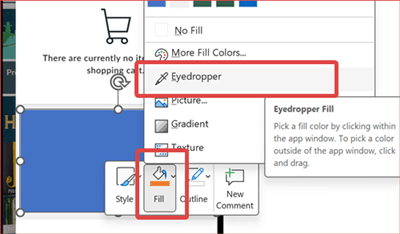
3. To apply the same green colour, right-click the new shape, click Fill and select Eyedropper.
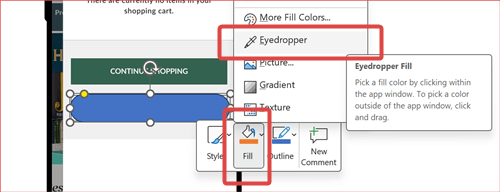
4. Move the eyedropper tool over the green colour and click once.
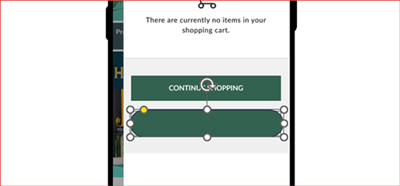
5. The colour is immediately applied to the new shape.
6. Now, let’s move on to the text! On the Insert tab, in the Text group, click Text Box.

7. Drag to draw the text box anywhere or close to the new shape. Type CONTINUE SHOPPING into the text box.
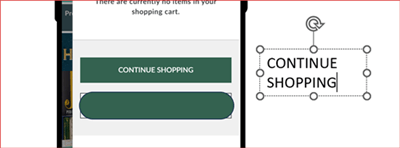
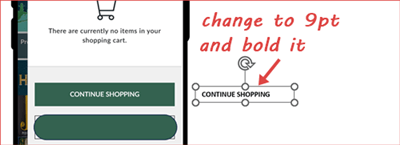
8. The default font size is 18pt with font type Calibri. This could be different for you based on your PowerPoint default settings. Change the font size so that it is close to the actual text. In this case, I’ve changed it to 9pt, and also bold the text.
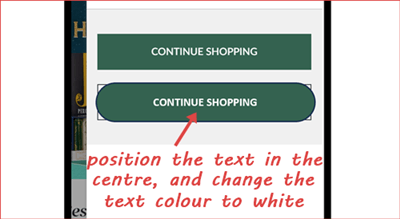
9. Drag the CONTINUE SHOPPING text box over the new green button and position it so that it is centred-aligned. Change the font colour of the text to white.
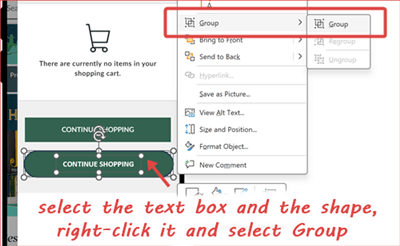
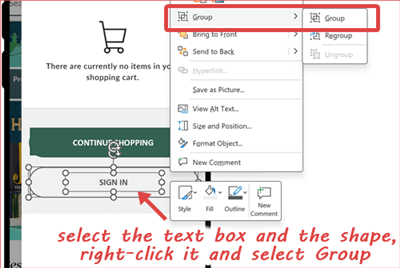
10. Select the text box and the rounded rectangle shape, right-click it and select Group. Let’s call it Group 1.
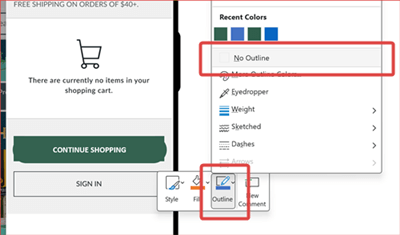
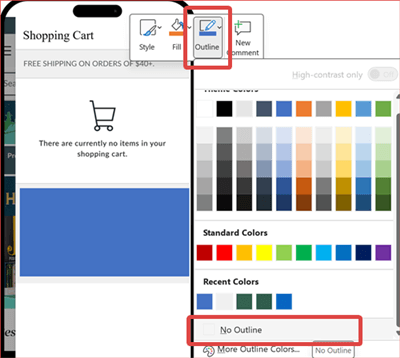
11. Move Group 1 above so that it covers the existing “CONTINUE SHOPPING” button. Then, right-click Group 1, click Outline and select No Outline to remove the default border colour.
Create the second rounded button
12. While Group 1 is still selected, use the keyboard shortcuts Ctrl + D to duplicate Group 1. Let’s call this Group 2. Move Group 2 below the “CONTINUE SHOPPING” button so that it covers the existing “SIGN IN” button, change the text to SIGN IN and make it centred-aligned.
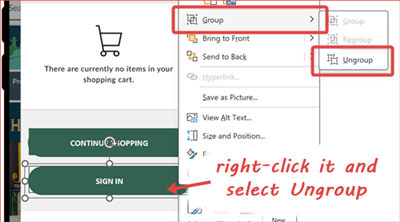
13. Ungroup the “SIGN IN” button by right-clicking Group 2 and select Ungroup.
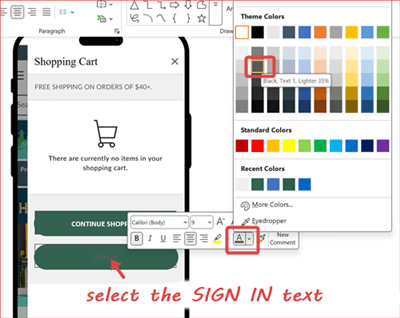
14. Select the “SIGN IN” text, click Font Color and select Black, Text 1, Lighter 35%.
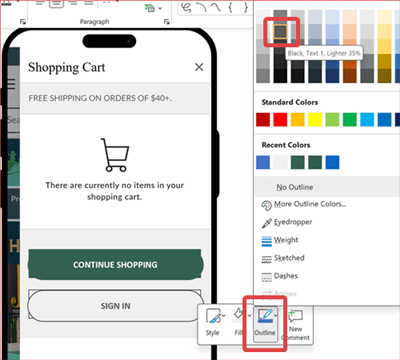
15. Right-click the new rounded rectangle shape, click Fill and select Eyedropper.
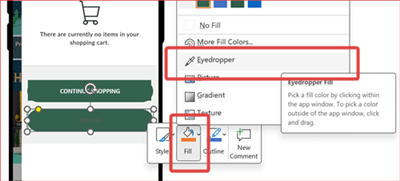
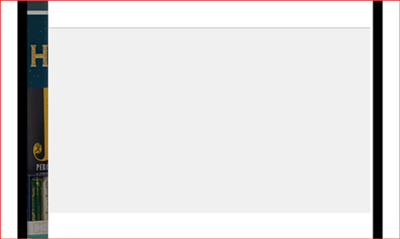
16. Move the eyedropper tool over the grey colour background and click once.
17. The colour is immediately applied to the new shape.
18. Right-click the grey rounded rectangle shape, click Outline and select Black, Text 1, Lighter 35%.
19. Select the “SIGN IN” text box and the grey rounded rectangle shape, right-click it and select Group. Let’s call it Group 2 again.
Hide the old buttons
20. On the Insert tab, in the Illustration group, click Shapes and select Rectangle.
21. Drag to draw the shape just over the two buttons.
22. Right-click the rectangle shape, click Outline and select No Outline.
23. Right-click the rectangle shape again, and this time, click Fill and select Eyedropper.
24. Move the eyedropper tool over the grey colour background and click once.
25. The colour is immediately applied to the new shape.
26. Here’s the tricky part. To select the two “hidden” buttons, move your cursor just slightly over the outer area of the buttons but still within the grey rectangle area, left-click and drag till you’re certain it covers the buttons, then release. It will look like this when both are selected:
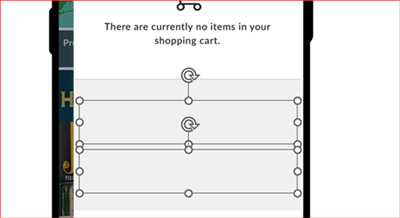
If you accidentally selected the grey rectangle, just press the Shift button and left-click the rectangle at the same time to unselect it.
27. Right-click the selected shapes and select Bring to Front.
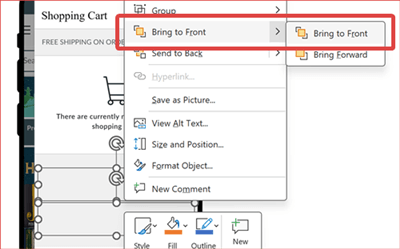
28. And there you have it! Both buttons are now visible.
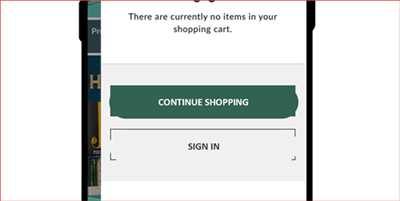
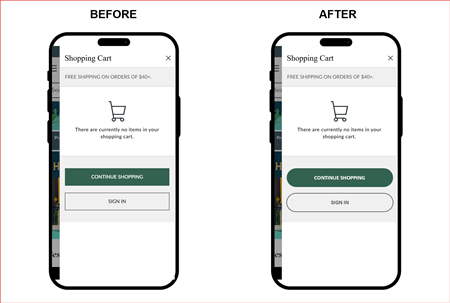
Here’s a side-by-side comparison of the before and after state:
So the next time if you’re updating a presentation that contain existing images and you want to edit some elements in it, don’t rush to open a separate photo editor or raise an urgent IT request to your department to get a photo editor installed in your laptop! If you found this tutorial helpful, share it with your colleagues or bookmark it for your next project.