In my previous tutorial, you have learnt the basics of how to control the headings in your document. Now let’s understand the reason why you should use the paragraph attributes of the headings to control where the headings begin and how it can help you to better manage your document.
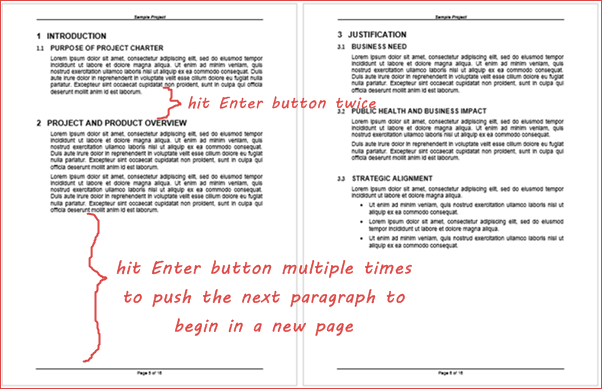
Picture this really simple (and common) scenario. You have a document, let’s say a Project Charter that is 20 pages long. You normally hit the Enter button multiple times to create spaces between paragraphs and to decide where the next paragraph should start. Heck, you probably use this way to adjust the spacing throughout the entire document!
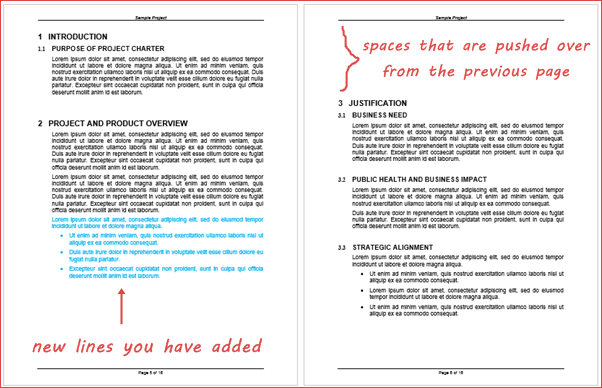
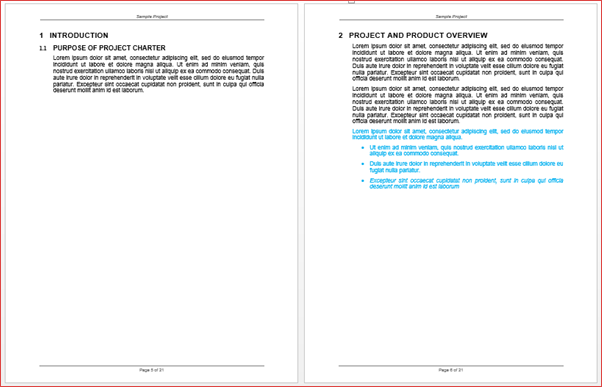
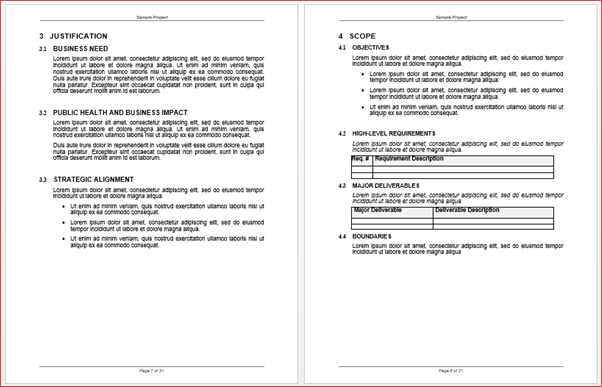
After you’re done with the document, you review it with other team members and conclude that more information is required. So, you add more points under section “2 Project And Product Overview” (text in blue as shown below). What happens next is, section “3 Justification” gets pushed down further in the next page because the new text that you enter have created additional lines in the paragraph, which in turn, drive the empty spaces at the bottom of the paragraph.
Ah, but you think that this isn’t a big deal. You can just press the Backspace button to adjust the paragraph headings. But…imagine the tedious changes you have to make if the above scenario occur in a document that has a lot of pages. Like a proposal with over 50 pages. Or like a user manual with over 100 pages. Any additional text that you add (or delete) will change the entire pagination of the document if you use the Enter button to create spaces between paragraphs!
To solve the exemplary scenario above, start with eliminating the empty spaces and editing the headings’ attributes. Let’s assume that you want to start every main heading at the beginning of a new page:
1. Eliminate all empty spaces that you have previously created with the Enter button, right until the last sentence of the newly created lines. It’ll look something like this:
2. Right-click the heading “1 Introduction” and select Paragraph from the pop-up menu.
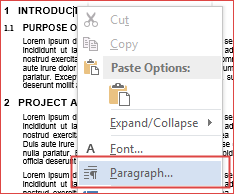
Note: You can also select other main headings in the document (e.g. “2 Project And Product Overview” or “3 Justification”)
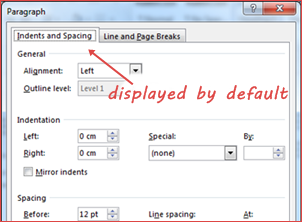
3. The Paragraph dialog box will appear. By default, the Indents and Spacing tab is selected and displayed.
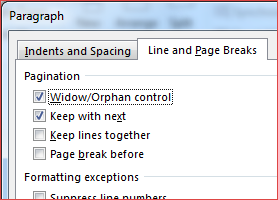
4. Click the Line and Page Breaks tab. You will see something similar like this:
5. Uncheck the Keep with next checkbox and check the Page break before checkbox. Click the OK button.
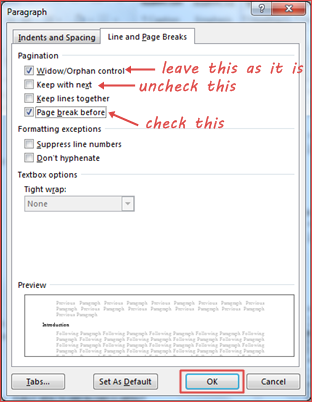
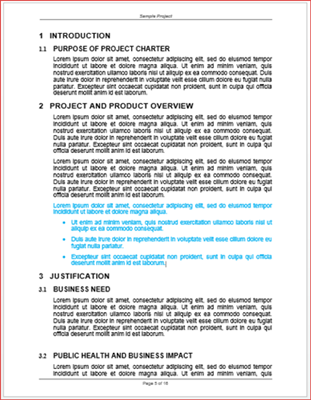
6. Voila! All of the main headings in the document will start right at the top of a new page.
Word 2013 is smart enough to apply the changes to automatically start all main headings in a new page throughout the document. However, it depends on whether the headings are uniformly formatted or not, so the changes may only apply to “1 Introduction”. Of course there is a way to resolve that if the changes does not automatically apply to all the main headings in the document, but this will be in my next post!
In a nutshell, you should control your document’s headings because it helps you to effectively manage your document’s pagination and formatting by eliminating unnecessary adjustments you need to make over the manual way of creating empty spaces. Plus, it definitely improves document readability!