
In my previous tutorial, you have learnt how to insert an email message (Outlook) as an embedded object in a document. Now, let’s take a look at how you can change the look of a default icon into something more interesting.
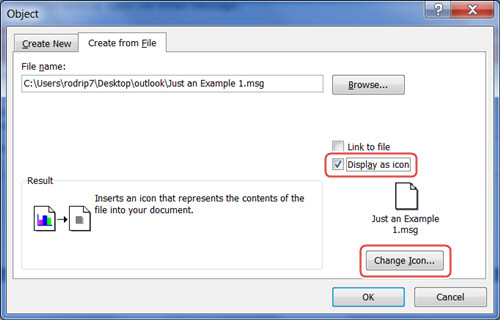
1. Repeat Step 1 to Step 6 in the previous tutorial in case you have forgotten how to insert an embedded email object. Then, click the Display as icon checkbox and click the Change Icon button.
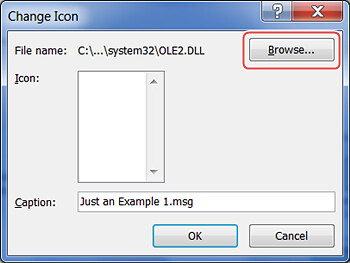
2. A Change Icon dialog box appears. Click the Browse button to look for a suitable icon in your C drive.
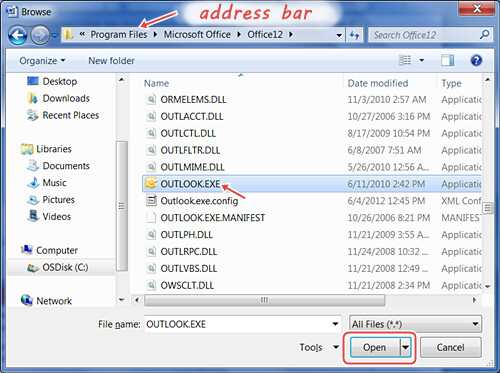
3. In Word 2007, the Microsoft Outlook icons are located in this folder: C:\Program Files\Microsoft Office\Office12\. You can copy this folder path and paste it into the address bar of the dialog box. After that, select the Outlook.exe filename and click the Open button.
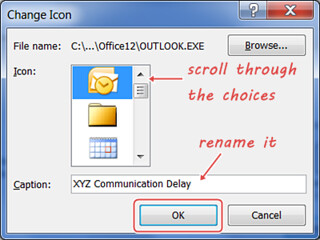
4. You are now back at the Change Icon dialog box. Note that the previously empty Icon box is now loaded with several Outlook icons. You can scroll through the choices and select the icon that you like. In the Caption textbox, type in the description and click the OK button.
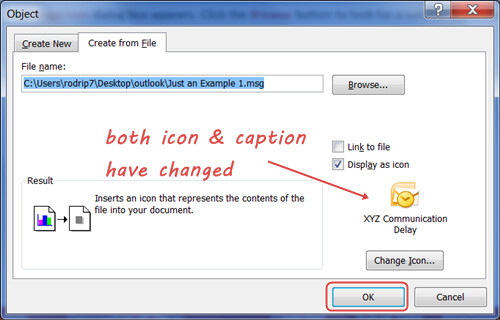
5. You are back at the Object dialog box. Note that both the icon and caption have changed. Click the OK button.
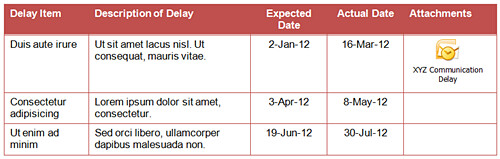
6. Now the embedded email object has a nice facelift to it, with an edited caption.


I used the method to save the icon with renaming function, but after saving the excel file, the icon name is renamed automatically as “452USmsg” like a code. How to solve it and what reason to make it?